# Getting Started *
Guide to get you started with everything you need to get a device added to your new miAlarm app.
# Installation
### Download and Installation
#### iOS Installation
1. Open the App Store on your iPhone or iPad
2. Search for "miAlarm"
3. Tap "Get" to download and install
4. Wait for the installation to complete
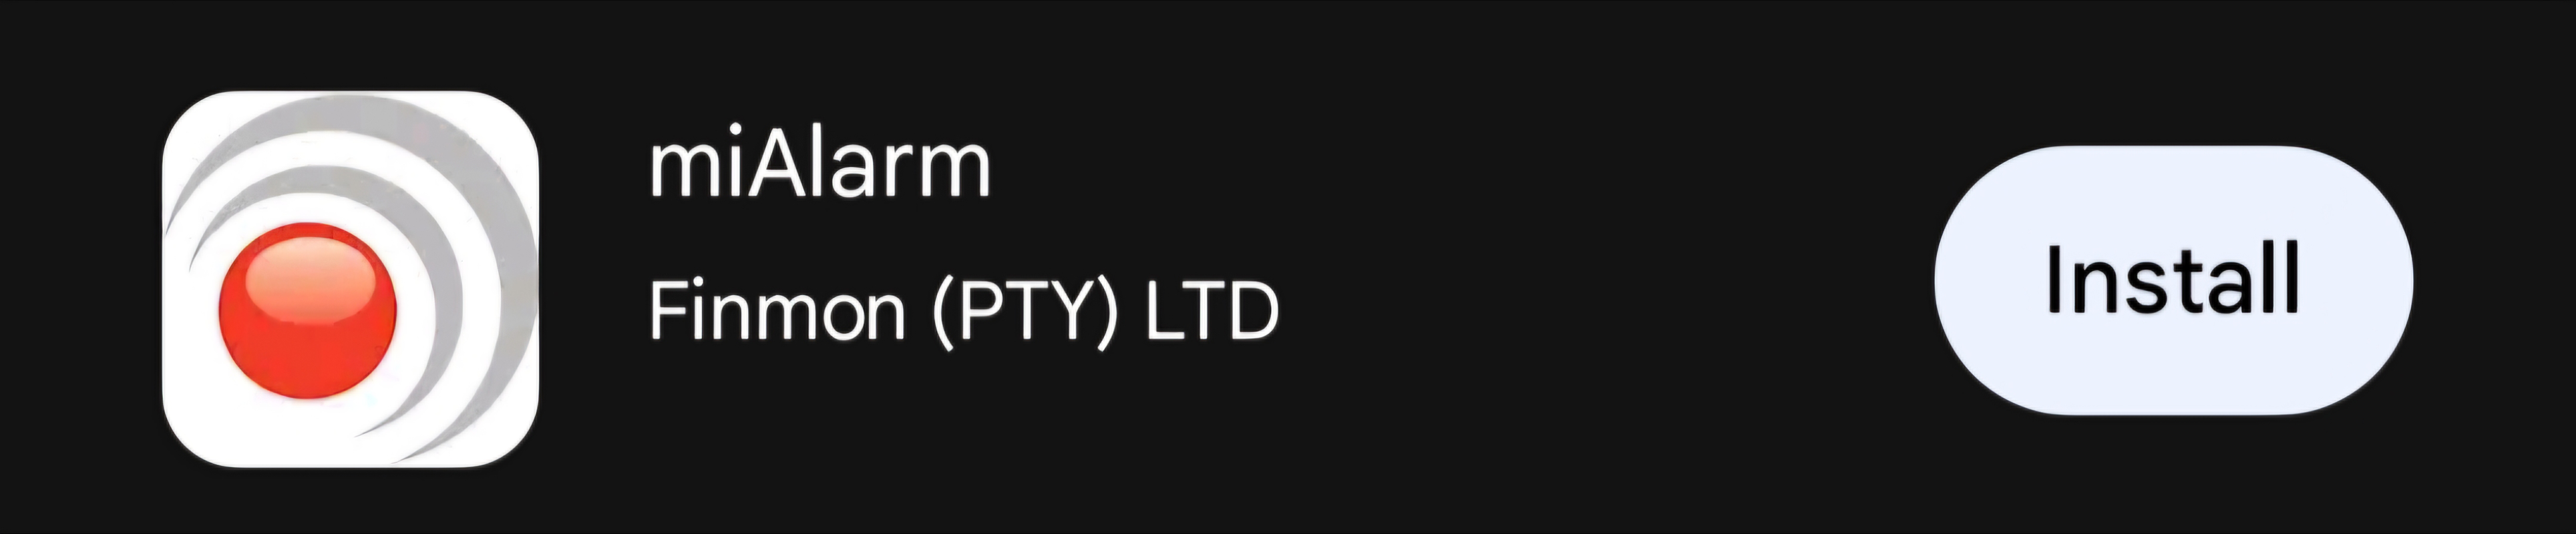
 #### Android Installation
1. Open Google Play Store
2. Search for "miAlarm"
3. Tap "Install"
4. Accept the required permissions when prompted
#### Android Installation
1. Open Google Play Store
2. Search for "miAlarm"
3. Tap "Install"
4. Accept the required permissions when prompted
 #### Huawei Installation
1. Open Huawei AppGallery
2. Search for "miAlarm"
3. Tap "Install"
#### Huawei Installation
1. Open Huawei AppGallery
2. Search for "miAlarm"
3. Tap "Install"
 **Note**: Ensure you have a stable internet connection before beginning the download.
#### Direct Links
**iOS**: [Download from App Store](https://apps.apple.com/app/mialarm)
**Android**: [Download from Google Play](https://play.google.com/store/apps/details?id=com.mialarm)
**Huawei** : [Download from AppGallery](https://appgallery.huawei.com/app/C103844591)
---
# Account Registration
### Creating Your Account
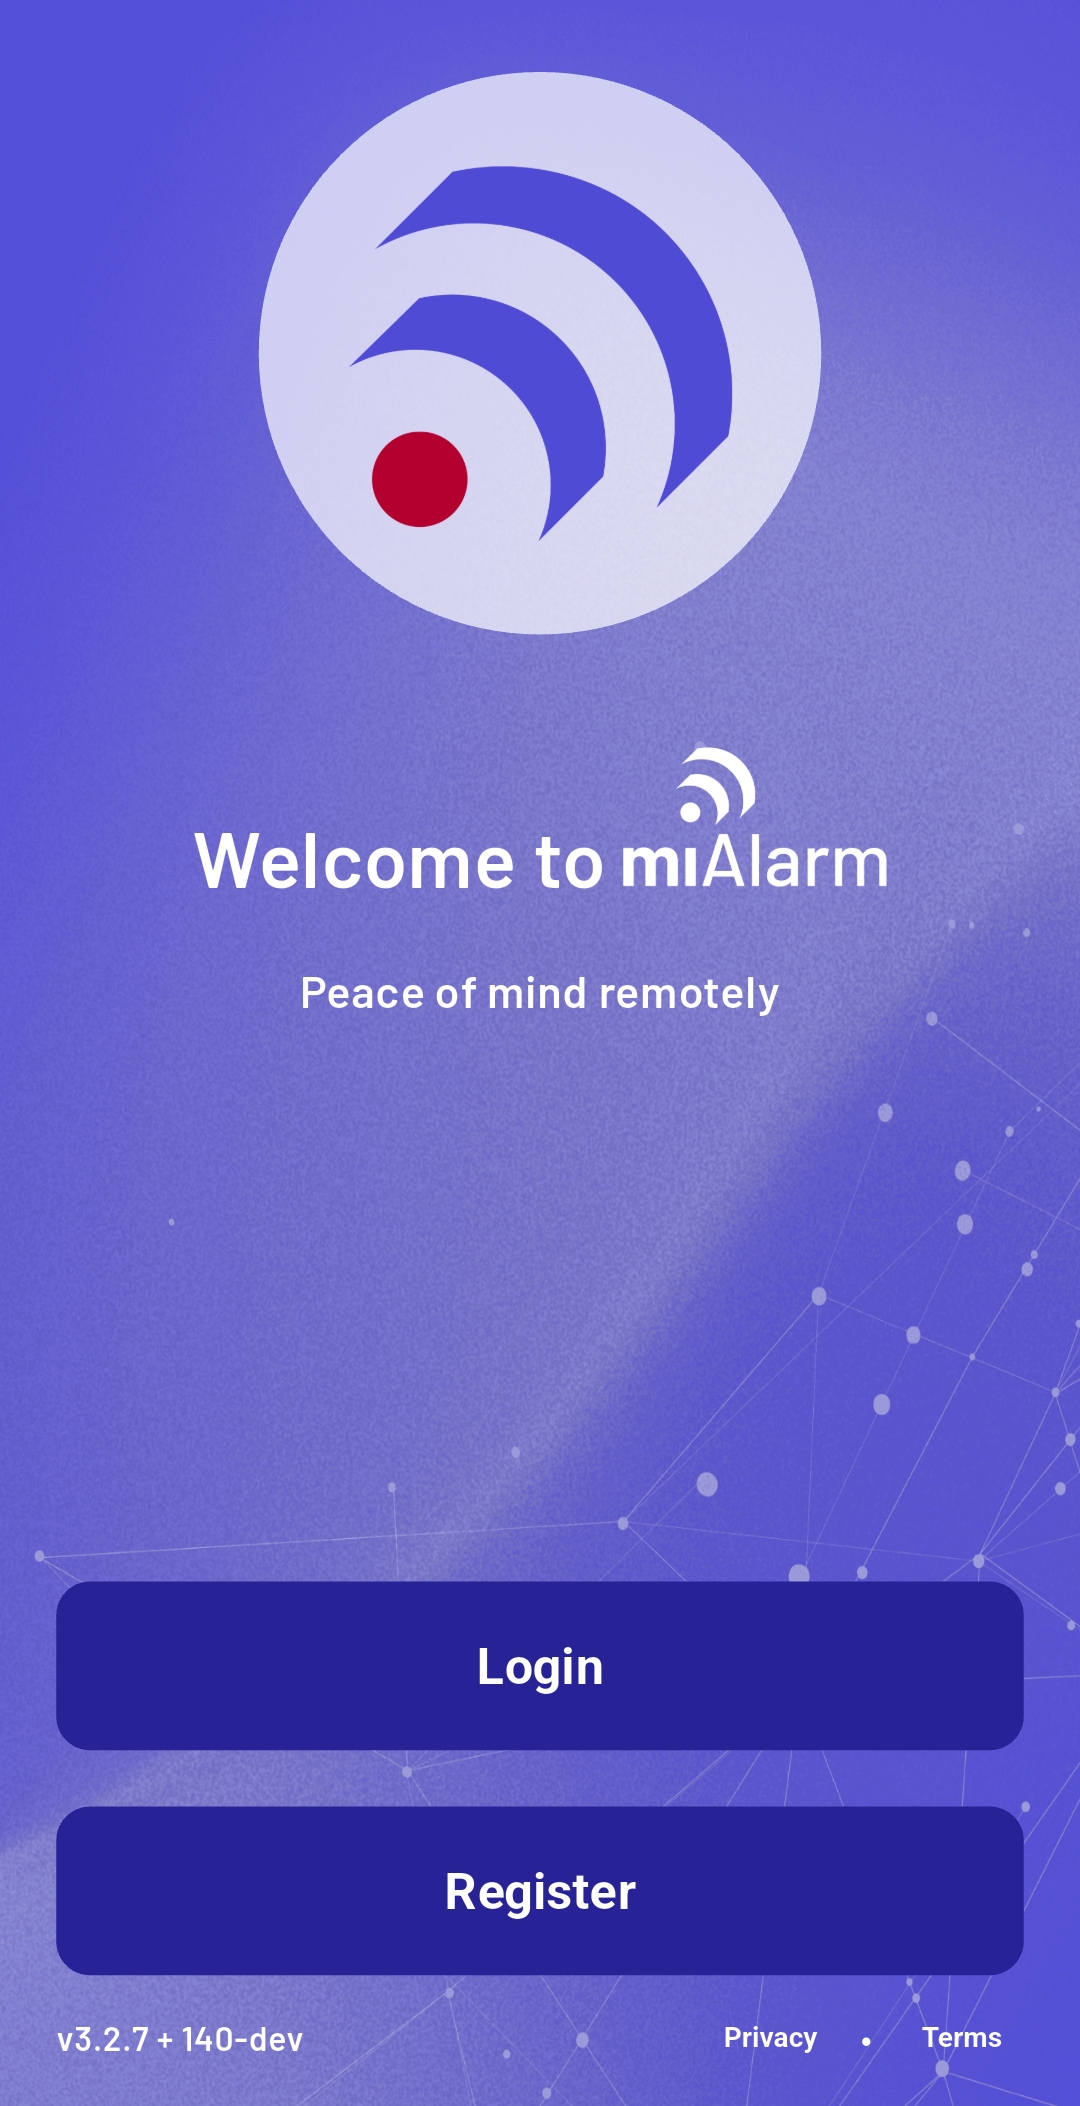
#### First Launch
When you open miAlarm for the first time, you'll see a welcome screen with two options:
- **Login** - For existing users
- **Register** - For new users
**Note**: Ensure you have a stable internet connection before beginning the download.
#### Direct Links
**iOS**: [Download from App Store](https://apps.apple.com/app/mialarm)
**Android**: [Download from Google Play](https://play.google.com/store/apps/details?id=com.mialarm)
**Huawei** : [Download from AppGallery](https://appgallery.huawei.com/app/C103844591)
---
# Account Registration
### Creating Your Account
#### First Launch
When you open miAlarm for the first time, you'll see a welcome screen with two options:
- **Login** - For existing users
- **Register** - For new users
 #### Registration Process
Select "Register" and provide the following information:
1. **Personal Details**
- First Name
- Last Name
- Username (this will be your login ID - choose carefully)
- Email Address
- Contact Number
#### Registration Process
Select "Register" and provide the following information:
1. **Personal Details**
- First Name
- Last Name
- Username (this will be your login ID - choose carefully)
- Email Address
- Contact Number
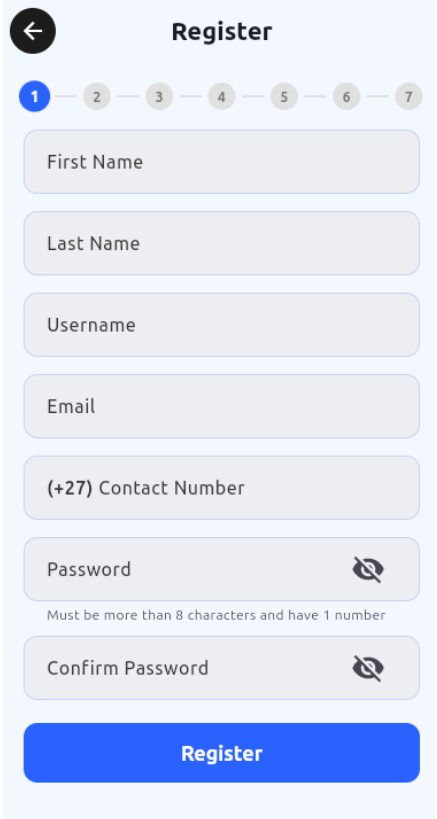 3. **Security Credentials**
- Password (must include at least one number and one uppercase letter)
- Confirm Password
4. Complete registration by tapping "Register"
**Important Considerations**:
- Each email address and phone number can only be used for one account
- Your username cannot be changed after registration
- Store your password securely - you'll need it for future logins
- Create a unique profile per user to avoid any notifications not arriving.
---
# Adding Devices
### Adding Your First Device
After successful registration, you'll be automatically logged in and prompted to add your first device.
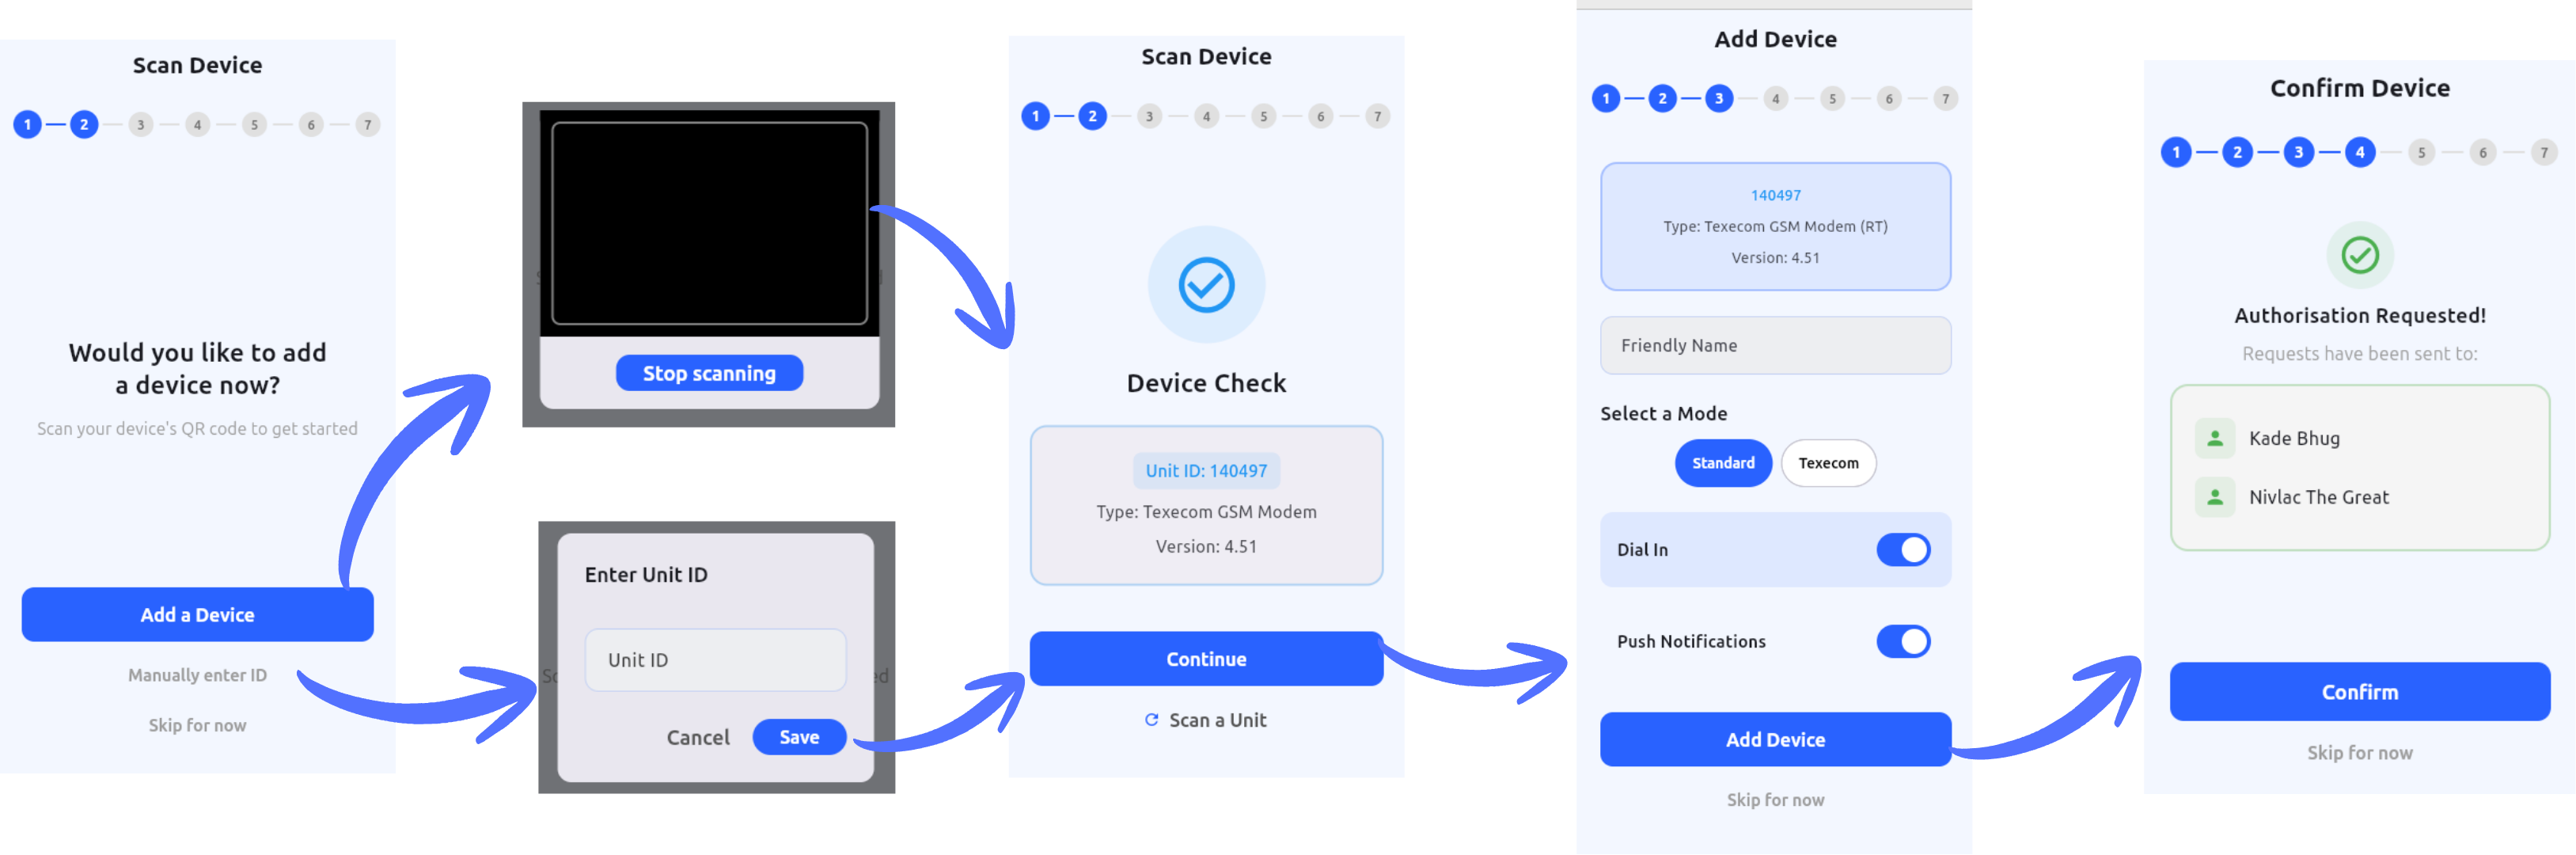
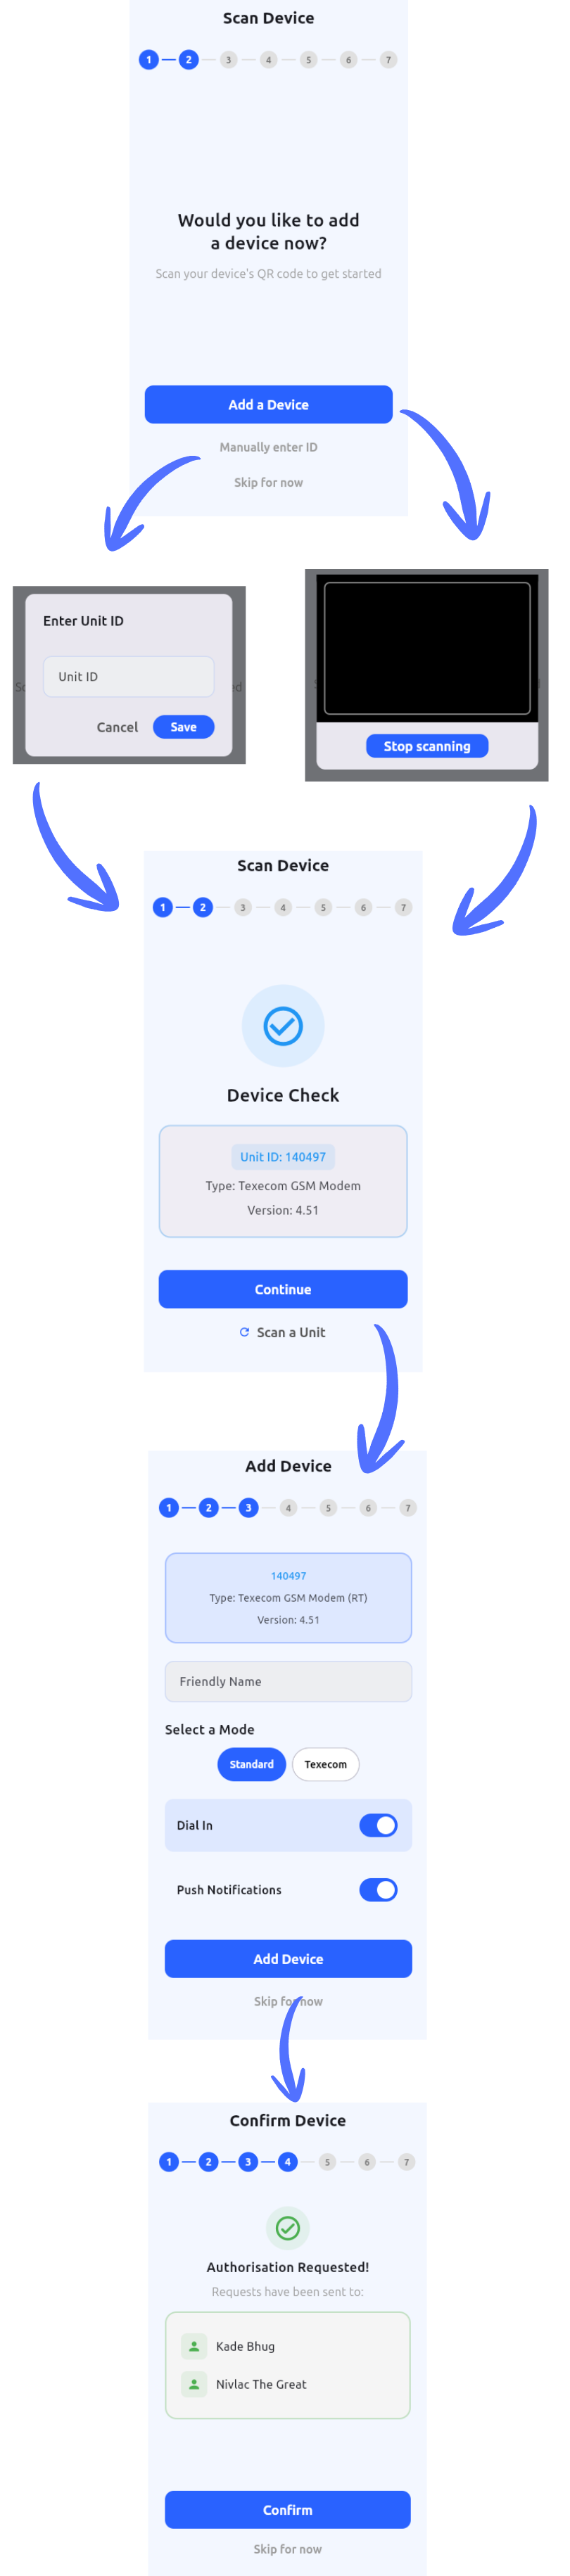
#### Option 1: Scan Device Barcode (Recommended)
The fastest way to add your device:
1. Tap "Add a Device"
2. Allow camera access when prompted
3. Scan the QR code or barcode on your Finmon device
4. The system will automatically populate the device details
#### Option 2: Manual Entry
If scanning isn't possible:
1. Tap "Manually enter ID"
2. Type your Unit ID (found on the serial number label of your Finmon device)
3. Tap "Continue"
#### Device Configuration
Once your device is identified, configure these settings:
1. **Friendly Name**: Give your device a meaningful name (e.g., "Home Alarm", "Office Security")
2. **Dial-In Access**: Enable this option to allow remote control of your alarm panel
3. **User Code**: Enter your 4-digit alarm code (the same one you use on your keypad)
4. **Push Notifications**: Enable to receive real-time alerts on your phone
5. Tap "Add Device" to save your configuration
---
### Understanding the Authorization Process
After adding a device, you'll encounter one of three authorization statuses:
#### Authorization Requested
Your request has been sent to the device administrators. This is normal for shared systems where multiple users have access. Wait for an existing administrator to approve your request.
#### Master Access Granted
You've been approved as a device administrator. The device will now appear on your home screen with full access privileges.
#### Duplicate Device
The system detected this device is already linked to your account. Simply return to the home screen and look for your device in the list.
If you are unable to find your device, select the 3 menu lines on the top left of the screen, then select System Options and Restart.
---
# First Connection
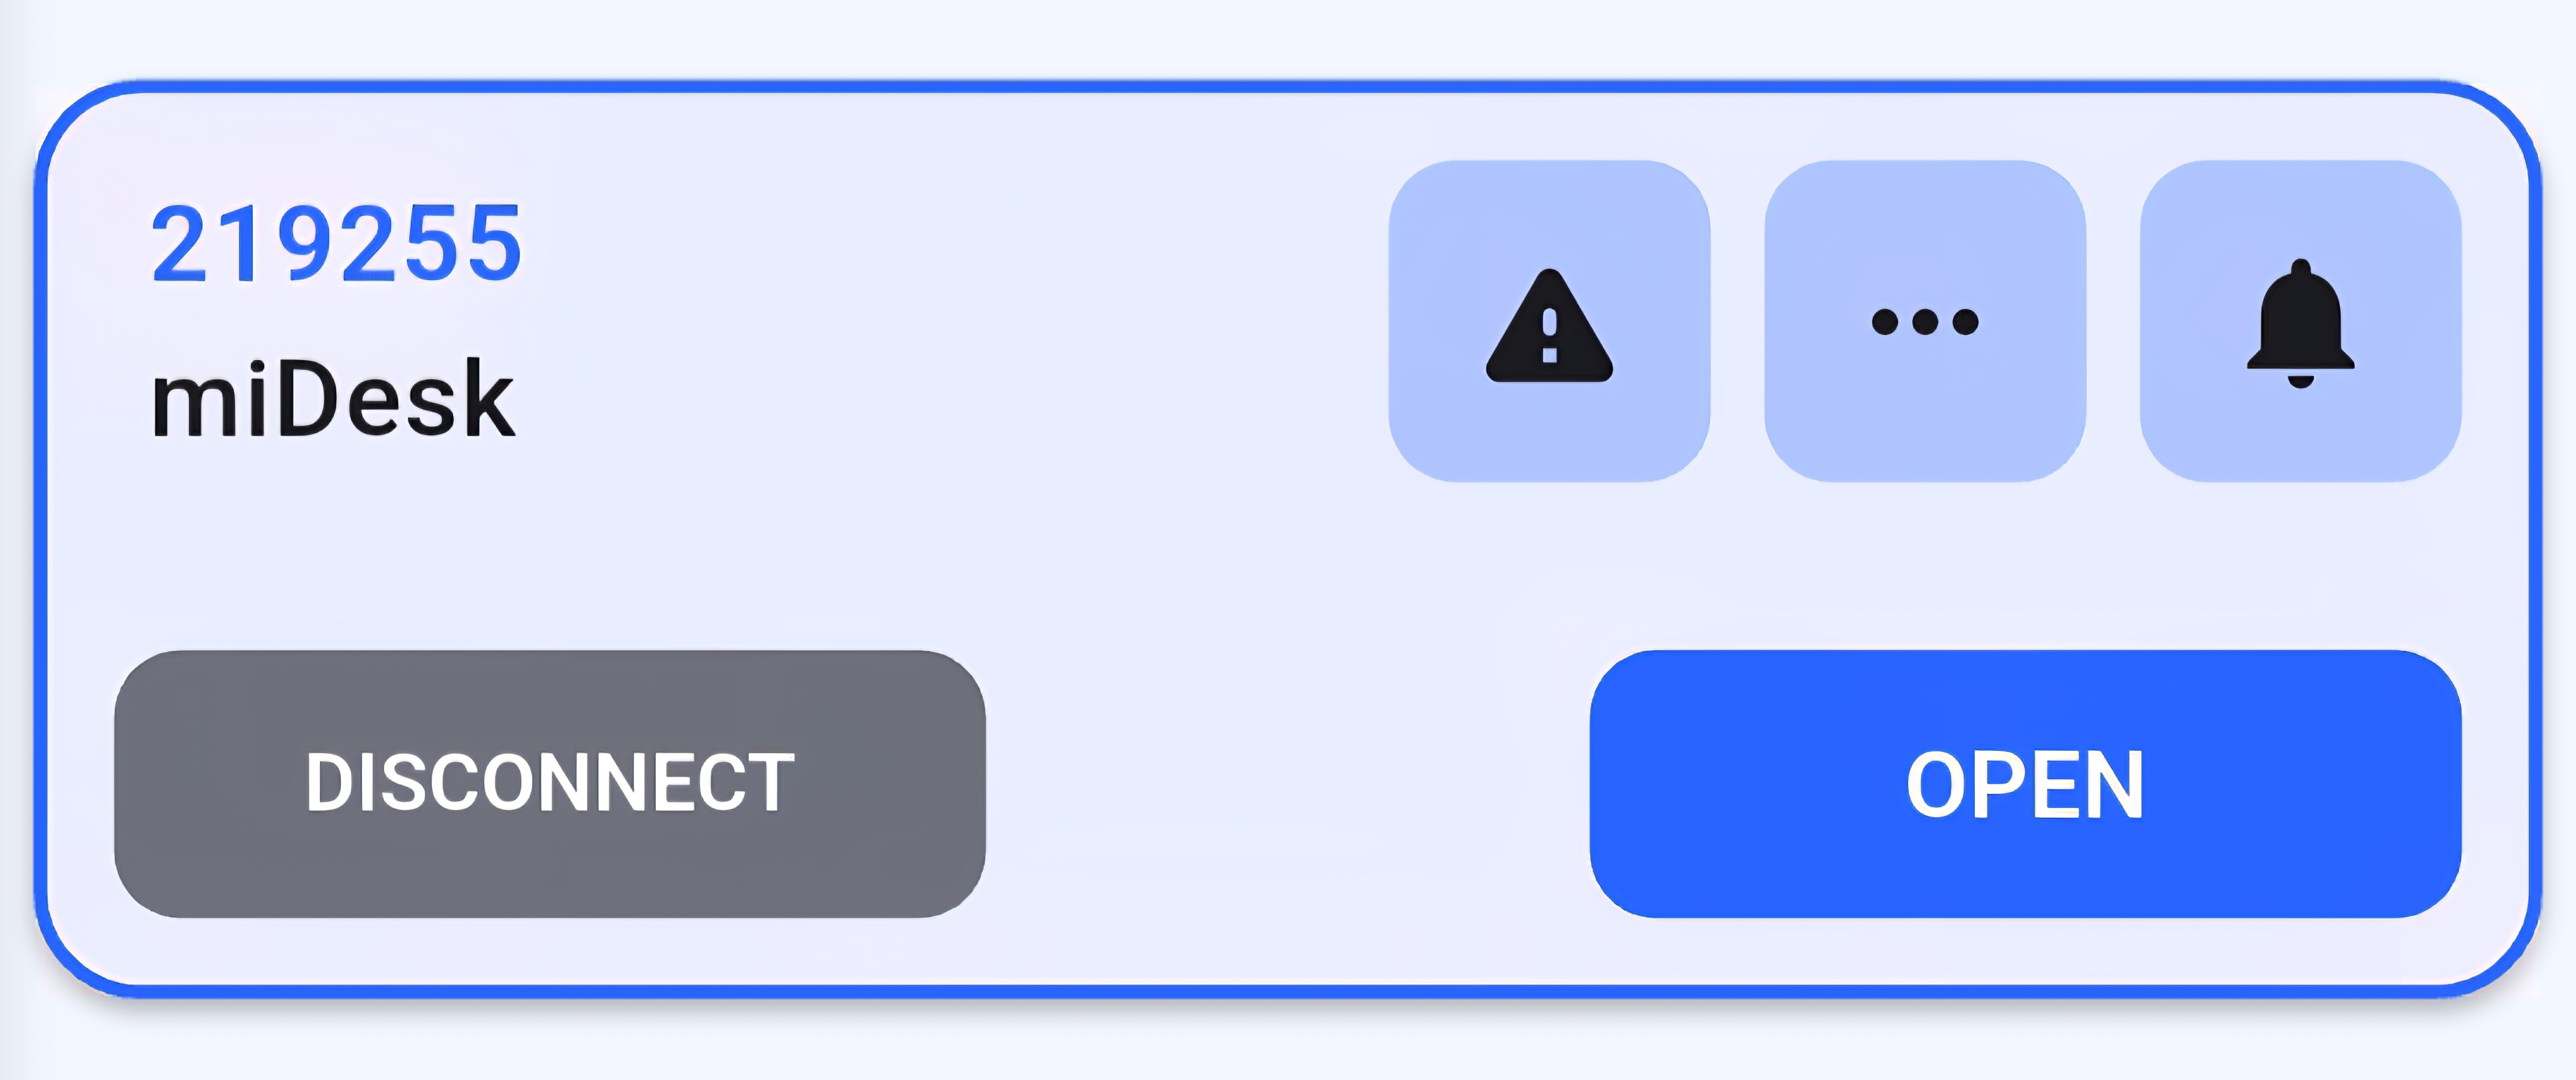
### Connecting to Your Device
Once authorized, your device appears on the home screen showing:
- Device name
- Unit ID
- Connection status
- "Open" or "Connect" button
3. **Security Credentials**
- Password (must include at least one number and one uppercase letter)
- Confirm Password
4. Complete registration by tapping "Register"
**Important Considerations**:
- Each email address and phone number can only be used for one account
- Your username cannot be changed after registration
- Store your password securely - you'll need it for future logins
- Create a unique profile per user to avoid any notifications not arriving.
---
# Adding Devices
### Adding Your First Device
After successful registration, you'll be automatically logged in and prompted to add your first device.
#### Option 1: Scan Device Barcode (Recommended)
The fastest way to add your device:
1. Tap "Add a Device"
2. Allow camera access when prompted
3. Scan the QR code or barcode on your Finmon device
4. The system will automatically populate the device details
#### Option 2: Manual Entry
If scanning isn't possible:
1. Tap "Manually enter ID"
2. Type your Unit ID (found on the serial number label of your Finmon device)
3. Tap "Continue"
#### Device Configuration
Once your device is identified, configure these settings:
1. **Friendly Name**: Give your device a meaningful name (e.g., "Home Alarm", "Office Security")
2. **Dial-In Access**: Enable this option to allow remote control of your alarm panel
3. **User Code**: Enter your 4-digit alarm code (the same one you use on your keypad)
4. **Push Notifications**: Enable to receive real-time alerts on your phone
5. Tap "Add Device" to save your configuration
---
### Understanding the Authorization Process
After adding a device, you'll encounter one of three authorization statuses:
#### Authorization Requested
Your request has been sent to the device administrators. This is normal for shared systems where multiple users have access. Wait for an existing administrator to approve your request.
#### Master Access Granted
You've been approved as a device administrator. The device will now appear on your home screen with full access privileges.
#### Duplicate Device
The system detected this device is already linked to your account. Simply return to the home screen and look for your device in the list.
If you are unable to find your device, select the 3 menu lines on the top left of the screen, then select System Options and Restart.
---
# First Connection
### Connecting to Your Device
Once authorized, your device appears on the home screen showing:
- Device name
- Unit ID
- Connection status
- "Open" or "Connect" button
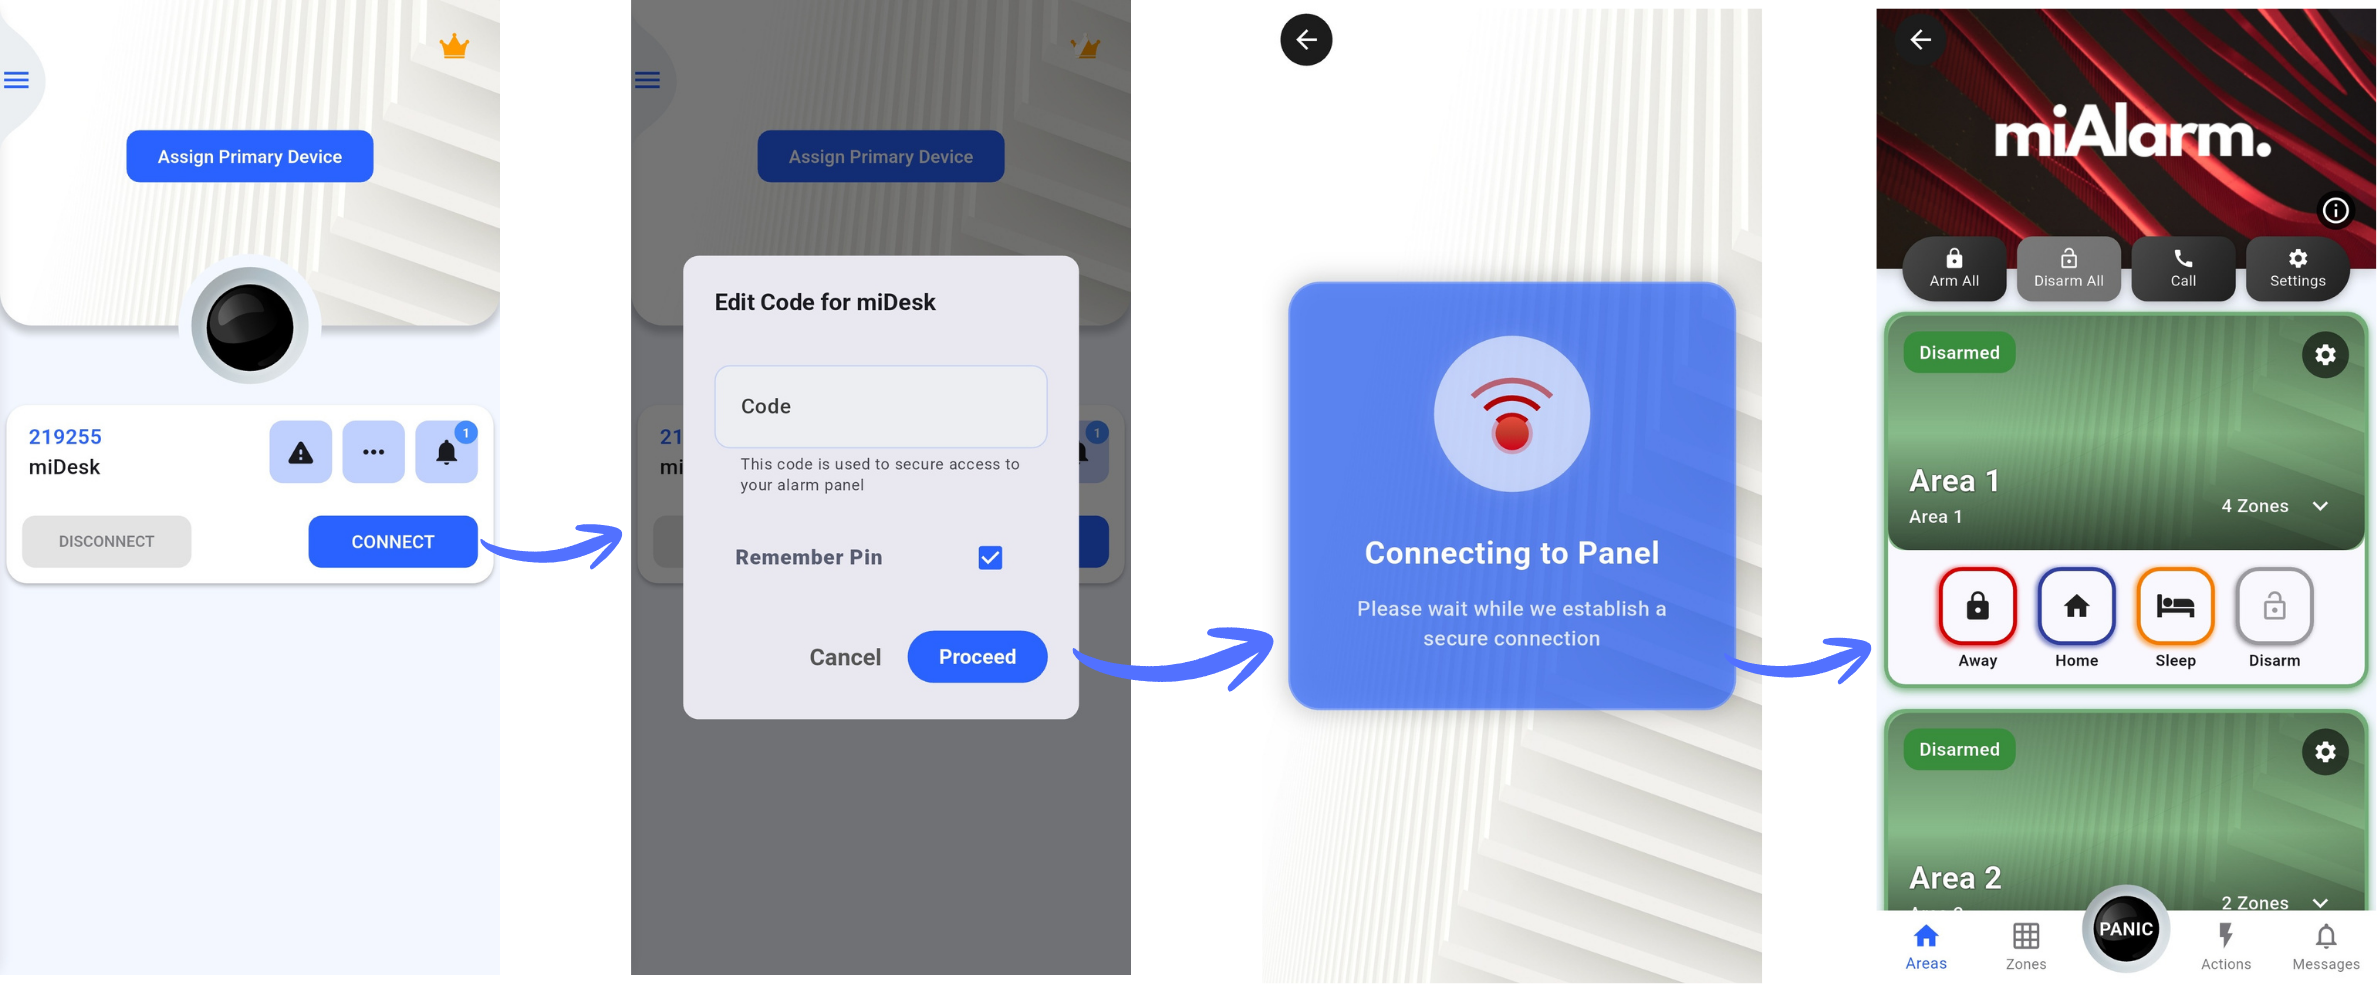
 #### Making Your First Connection
1. Tap "Open" on your device tile
2. If prompted, enter your 4-digit user code
3. Wait for the connection to establish (you'll see a loading screen)
4. Once connected, you'll have full access to monitor and control your alarm system
#### Making Your First Connection
1. Tap "Open" on your device tile
2. If prompted, enter your 4-digit user code
3. Wait for the connection to establish (you'll see a loading screen)
4. Once connected, you'll have full access to monitor and control your alarm system
 **Connection Tips**:
- Ensure your alarm unit has power and network connectivity
- The unit should show a green network status light
- If connection fails, verify your user code is correct
---
### Next Steps
Now that you're connected, explore these essential features:
- **Set a Primary Device**: For quick access from the home screen
- **Configure Notifications**: Customize which alerts you receive
- **Add Emergency Contacts**: Set up quick access to important numbers
- **Explore Your Panel**: Familiarize yourself with zones and areas
---
**Connection Tips**:
- Ensure your alarm unit has power and network connectivity
- The unit should show a green network status light
- If connection fails, verify your user code is correct
---
### Next Steps
Now that you're connected, explore these essential features:
- **Set a Primary Device**: For quick access from the home screen
- **Configure Notifications**: Customize which alerts you receive
- **Add Emergency Contacts**: Set up quick access to important numbers
- **Explore Your Panel**: Familiarize yourself with zones and areas
---